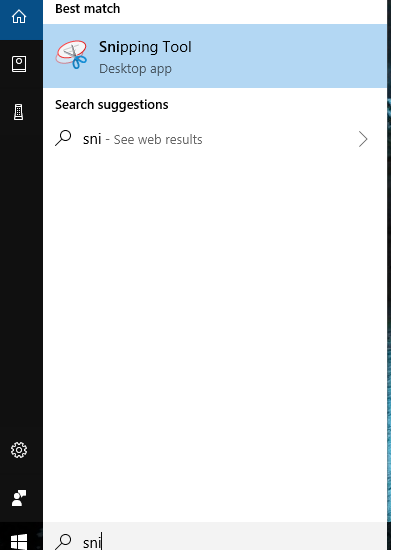
How to Effectively Use the Snipping Tool for Quick Screenshots in 2025
In today’s digital landscape, capturing and sharing information quickly and efficiently is essential. The Snipping Tool is one of the most effective screenshot tools available, allowing users to capture screen content effortlessly. Whether you’re a student, professional, or a remote worker, understanding how to use the Snipping Tool can significantly enhance your productivity. In this comprehensive guide, we’ll delve into the features, shortcuts, and best practices to maximize your experience with the Windows Snipping Tool.
Understanding the Snipping Tool Features
The Snipping Tool is a versatile application that comes pre-installed in Windows. Its features make it a powerful ally for anyone needing to capture and edit screen images quickly. The primary functions include four capture modes: Free-form, Rectangular, Window, and Full-screen snips. Each mode serves a unique purpose, allowing users to tailor their screenshotting experience according to their needs. The snipping tool interface is user-friendly, making navigation simple even for first-time users.
Modes of Capture
The Snipping Tool offers versatile modes to cater to different screenshot needs. The Free-form mode lets you draw a custom shape around the desired section, ideal for capturing irregularly-shaped content. The Rectangular mode allows for precise rectangular selections—a standard choice for most users. The Window mode is excellent for capturing specific application windows, providing a clean, unobstructed view. The Full-screen mode captures the entire screen, perfect for comprehensive snapshots of multi-window layouts.
Editing Screenshots
One of the primary advantages of using the Snipping Tool is its built-in editing capabilities. After capturing your screenshot, you can make annotations directly within the tool. Use the pen tool for quick drawings or the highlighter to emphasize key areas. You can also erase any unwanted marks, ensuring your final image is clean and professional. These features make the Snipping Tool an all-in-one solution for quick editing screenshots without the need for additional software.
Snipping Tool Configuration
To utilize the Snipping Tool effectively, familiarize yourself with its customizable settings. Users can access snipping tool settings to change shortcut keys, notifications, and editing preferences. Adjusting these settings can streamline your workflow, allowing for quick access to frequently used modes. Furthermore, knowing how to navigate and configure the tool enhances user experience, helping you become proficient in capturing screen content without delay.
Exploring Snipping Tool Shortcuts and Workflow
Incorporating snipping tool shortcuts into your routine can drastically improve your workflow. Keyboard shortcuts allow users to capture screenshots without having to navigate to the tool each time. For instance, using “Windows + Shift + S” opens the Snipping Tool directly, letting you choose your capture mode instantly. Understanding and utilizing these shortcuts effectively is the key to maximizing your snipping tool productivity.
Setting Up Shortcuts
To make your experience seamless, consider assigning shortcut keys that are easy to remember. The Snipping Tool allows you to set these up through its settings menu. This adaptive approach not only saves time but also enables you to focus on your work rather than getting bogged down with menu navigation.
Establishing a Capturing Workflow
Creating a workflow with the Snipping Tool involves outlining steps to capture, edit, and share your screenshots effectively. Start by determining what you want to capture. Use the appropriate capture mode for the task at hand, then edit your image as necessary, saving your edits promptly. Consider categorizing images by project or topic for better organization, especially when documenting processes or sharing ideas visually.
Examples of Snipping Tool Usage
Utilizing the Snipping Tool in various scenarios demonstrates its versatility. For instance, educators can use it to capture portions of digital materials to create engaging lessons, while professionals might document software bugs for reporting. Additionally, remote workers can snip critical information from virtual meetings, creating visual notes to aid discussions. These practical usage examples illustrate the tool’s potential in enhancing daily workflows across diverse fields.
Overcoming Common Snipping Tool Issues
Like any software, the Snipping Tool can present challenges from time to time. Common issues include light capture, missing images upon saving, or the application’s unresponsive behavior. However, understanding basic snipping tool troubleshooting techniques can help mitigate these challenges, ensuring a smooth user experience.
Resolving Capture Issues
One frequent issue is encountering a lack of clarity in captured images. This can often be solved by increasing your screen resolution or adjusting the view settings prior to capture. Remember, capturing from high-resolution screens will yield clearer images but may result in larger file sizes. Additionally, ensure your graphics drivers are up to date to prevent any software hiccups.
Saving and Exporting Screenshots
Users may also face hurdles when saving or exporting their screenshots. The Snipping Tool provides options to save captured images in various formats such as PNG or JPEG. It’s vital to choose the correct format based on your intended use—PNG files boast better image quality, while JPEG can be used to save space. Familiarizing yourself with snipping tool saving options can prevent headaches down the line.
Alternatives to the Snipping Tool
For those requiring specific features not present in the Snipping Tool, exploring alternatives can be beneficial. Programs like Lightshot and Greenshot offer expanded functionalities, particularly in editing and organizational capabilities. However, the simple and quick nature of the Snipping Tool remains unmatched for basic screenshot requirements. Knowing the alternatives can help users make informed decisions based on their needs.
Key Takeaways
- Mastering the Snipping Tool can greatly enhance your workflow for capturing and sharing information.
- Familiarize yourself with the various modes and editing features to create quality visuals effortlessly.
- Utilizing shortcuts and establishing a consistent workflow can streamline your screenshotting practices.
- Understanding troubleshooting techniques can help resolve common issues quickly and efficiently.
- Exploring alternative screenshot tools might be necessary for specific advanced features.
FAQ
1. What is the most common use of the Snipping Tool?
The Snipping Tool is most commonly used for capturing screenshots of various content on your screen, whether it’s for sharing information, creating tutorials, or documenting processes in both personal and professional contexts.
2. Can the Snipping Tool edit images after they’re captured?
Yes, the Snipping Tool provides basic editing capabilities such as drawing, highlighting, and erasing parts of your screenshot immediately after capturing it, making it convenient for quick revisions.
3. How do I take a specific part of the screen with the Snipping Tool?
To capture a specific area, select the Rectangular or Free-form mode, which allows you to draw around the desired section. This gives you the flexibility to select exactly what you want from the screen.
4. What file formats can be used when saving screenshots from Snipping Tool?
You can save your screenshots in different file formats, including PNG and JPEG. The format you choose depends on whether you prioritize quality or file size.
5. How does the Snipping Tool compare with the Print Screen key?
While the Print Screen key captures the entire screen, the Snipping Tool provides greater flexibility with various capture modes and built-in editing features that allow for immediate annotations and modifications.
6. Can I use the Snipping Tool on Mac devices?
The snipping functionality is not available natively as a separate tool on Mac, but Mac users can utilize similar screenshot features integrated into the operating system, such as pressing Command + Shift + 4 for custom area captures.
7. Are there any resources available for learning more about the Snipping Tool?
Yes, many online tutorials and guides offer detailed instructions and tips for using the Snipping Tool effectively. Searching for “Snipping Tool documentation” or “Snipping Tool tutorial” can yield valuable resources.